Decorating pumpkins, picking apples, dressing up for Halloween and eating candy are all things kids love about October. To make this fall holiday even more magical, here are 10 fall craft ideas your kids will love.
Spiderweb Suncatchers
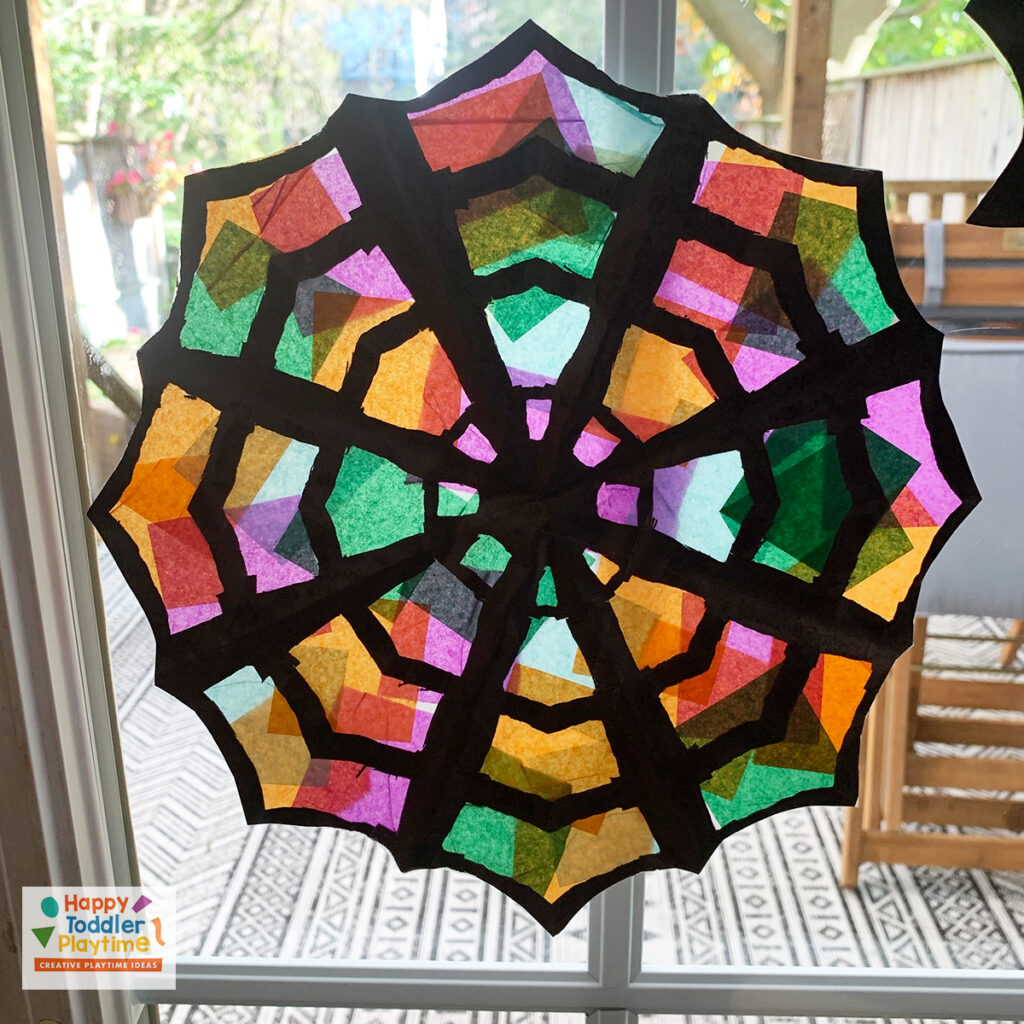
Made from black construction paper and colorful tissue paper, these spiderwebs can be hung in your kitchen or child’s bedroom window for spooky fun. Great for kids ages 4 and up.
Materials needed:
- Scissors
- Black construction paper
- Contact paper
- Tissue paper in several colors
Directions:
- Fold the sheet of black construction paper to create a triangle. Cut off the extra flap. Fold it again twice, then once more, and cut off the extra flap. To create the spider web shape, cut at the top of the fold and curve as you continue cutting down.
- Unfold the web and cut off two pieces of contact paper the same size as your spider web. Tape one sheet to a surface using masking tape, paper side up. Peel the paper off the contact paper and lay the web down on its sticky surface.
- Cut your tissue paper into squares, and use them to decorate the spider web. When the entire web is covered with tissue paper, peel the paper backing off the second piece of contact paper, laying the sticky side on the spider web to seal it. Use scissors to cut off the extra contact paper.

(Source: HappyToddlerPlaytime)
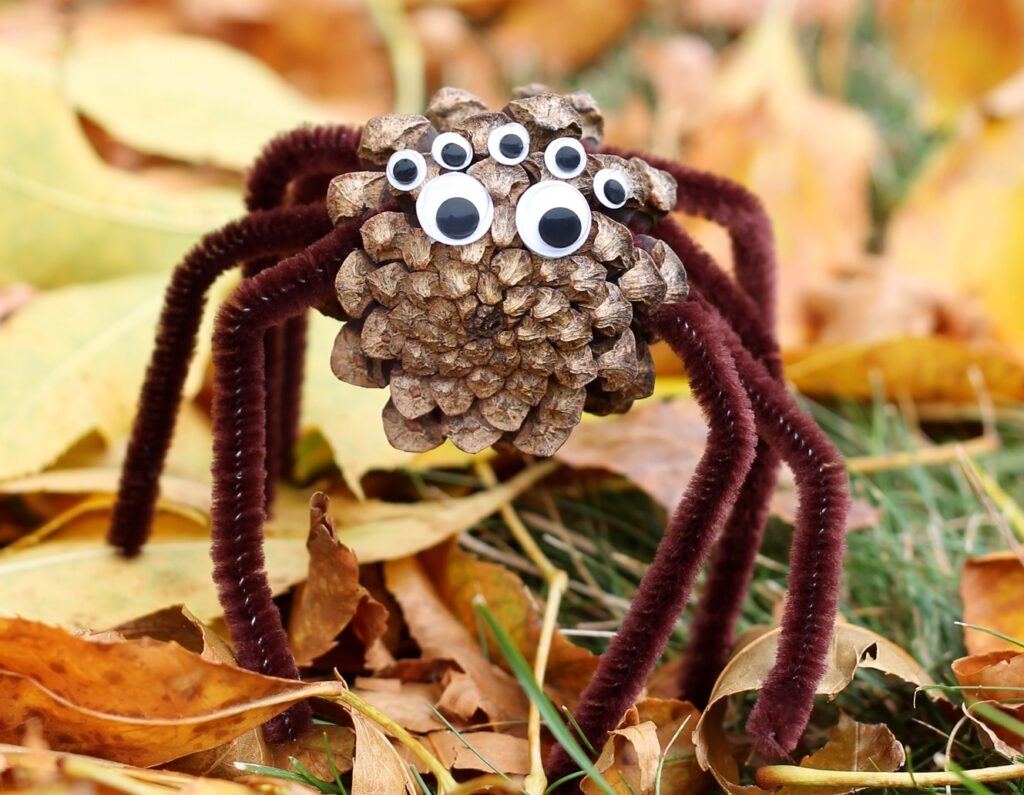
Pinecone Spiders
A perfect blend of creepy and cute, these natural-looking pinecone spiders make a great craft for groups of kids. It can also double as a summer camp activity in the warmer months! Place the finished spiders on bookshelves or other cozy nooks in your house.
Materials needed:
- low-temperature hot glue gun
- Round pine cones
- Wiggly eyes
- Brown chenille stems
- Scissors
Directions:
- Wrap 4 full-length chenille stems around the pinecone to make a total of 8 legs. Shape each chenille stem so they resemble spider legs, adjusting the length with scissors if necessary.
- Attach wiggly eyes to the bottom of the pinecone with hot glue. You can also use Glue Dots or tacky craft glue.
Fun fact: While some spiders have no eyes, some species have 8 and others have as many as 12. For extra fun, your child can use cotton butcher’s twine to create spider webs for the critters to dwell in.
(Source: FiesAndMudpies)
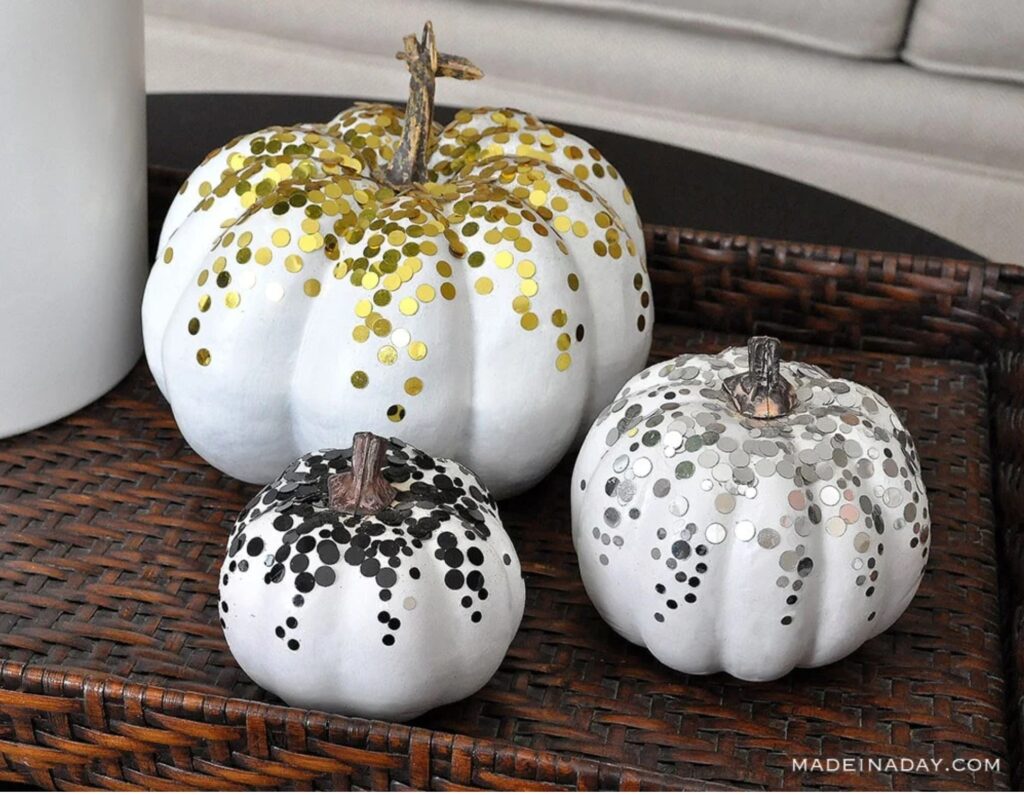
Confetti Pumpkins
If you don’t want the mess of carving a pumpkin, glam up some faux pumpkins with your kids instead. Made with metallic confetti and spray paint, these are perfect to place on your porch, steps or walkway.
Materials needed:
- Sponge applicator
- Elmer’s glue
- White faux pumpkins
- White satin spray paint
- Metallic confetti in various colors
Directions:
- Remove the pumpkin stems and spray paint the pumpkins. Let them dry.
- Paint the top of each pumpkin with glue, as well as the raised humps of the pumpkin between each crease.
- Sprinkle confetti over the pumpkin.If the confetti isn’t “dripping” down the pumpkin, use the sponge applicator to add dots of glue to the pumpkin, and stick the confetti on with your fingers. Fill in any gaps by adding more glue and confetti. Let the pumpkins dry and replace the stems.
(Source: ConfettiPumpkins)
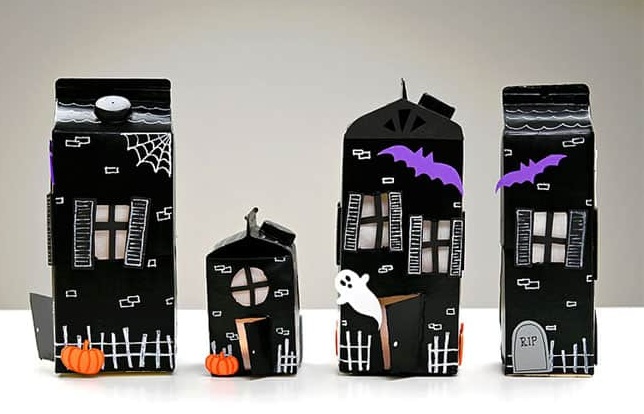
Milk Carton Haunted House
Though it requires a little more prep work, this festive haunted house is a great way to let your kids express their Halloween creativity. Older kids can help younger ones with some of the more complicated, craft-knife based steps.
Materials needed:
- Milk carton (washed out and dried)
- Sharpie
- Black acrylic paint
- Black craft foam
- White paint pen
- Glue
- Parchment paper
- Tape,
- Halloween foam stickers
- Battery operated tea light candle
- Utility knife for crafting
- Paintbrush
- Scissors
Directions
- To prepare the milk carton, draw two windows and a door shape on the left side of the carton to create the front of the haunted house. Using the utility knife, cut out the windows completely, and three sides of the door. Carefully use the knife to score a line on the fourth side of the door, but do not cut all the way through. This will allow the door to open more easily.
- Draw windows in the center of both sides of the house (the front and back of the milk carton). Cut the windows out with the utility knife, saving the scraps to use to measure decorations later. Cut an access door in the right side of the carton—one large enough to fit your hand in.
- Paint the milk carton black, and be sure to paint the cap and inside the door and windows as well. It is easiest to paint most of the container while holding it (and wait for the paint to dry before painting the lower third), or set it on scrap paper while you paint.
- Place a window scrap on a piece of black foam and cut a rectangle around it, making the foam slightly larger than the windows. Repeat for all four windows. Cut cross shapes out of the four foam squares to create window panes. Using a piece of foam window for size, cut a length of foam a bit taller than the window. Then, cut the long piece of foam into eight strips (about ½ inch wide). It doesn’t need to be exact! Crooked shutters make a perfect haunted house.
- Using a white pen, draw a rectangular outline on the shutters. Then draw short horizontal lines for slats on the shutters. Add window panes and parchment with tacky glue on the top and bottom of each window.
- Reach inside the house’s access door, and attach the window frame to each window using glue. Cut a piece of parchment paper large enough to fit inside the front of the house, and cover two windows and the door, attaching it with tape. Cut two more pieces of parchment to cover the side windows, attaching it with tape on the top and bottom.
- Decorate the house, using a white paint pen to draw a fence. Add glue to the back of the shutters and add them to the windows. Finally, glue on halloween shapes to add color to the house. Other fun additions: roof shingles, spider webs, and brick accents. To display, turn on your flameless tea light candle and put it inside the house. Close the door and admire it!
(Source: OneLittleProject)
Handprint Frankenstein
Handprint crafts aren’t just for Thanksgiving turkeys: Your kids can make Halloween handprint cards to show the fellow monsters in their life that they care (or give one to a secret admirer). We love this quirky-looking hand-print Frankenstein card..
Materials needed:
- Neon green cardstock
- Black paint
- Googly eyes
- Black cardstock
Directions:
- Fold the neon green cardstock in half.
- Have your child trace a hand so that their pinky is on the folded part of the card.
- Cut out the handprint, leaving the pinky part uncut so that the card will open up at this part.
- Paint the top of the hand black to make the Frankenstein hair. Add some zig zag lines in the hair when painting.Cut two strips from black cardstock to use for the eyebrows and mouth, and glue the googly eyes on top of the eyebrows.
- Add a Halloween message or hang the card on the fridge to admire your artwork.
(Source: TheBestIdeasForKids)
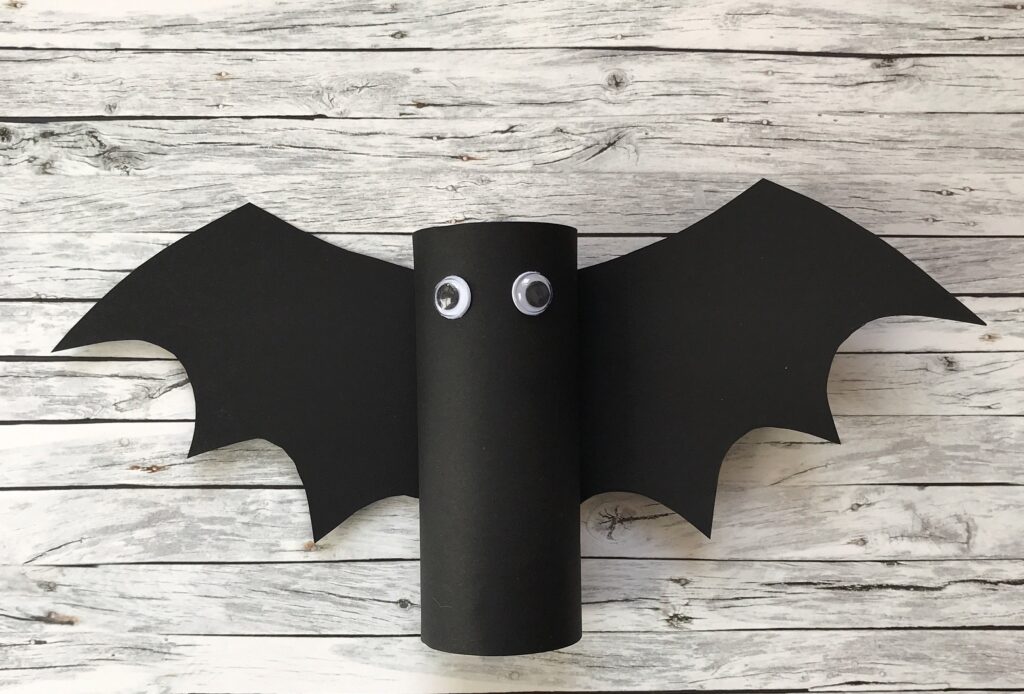
Vampire Bat
You can hang this adorable vampire bat upside-down so it looks like a real cave-dweller. This is a great craft if you have multiple kids: Older ones can cut paper for the ears and wings, while younger ones can glue on the finished parts. Be sure to assist with the hole-punch portion to avoid pinching little fingers.
Materials needed:
- An empty cardboard roll (toilet paper roll, or similar, cut to size)
- Black construction paper
- Scraps of pink and white paper
- Silver chenille stem
- Googly eye stickers
- Pencil
- Scissors
- Glue stick
- Bat wing template
- Hole punch (optional)
Directions:
- Cut a strip of black paper the width of your cardboard tube long enough to wrap once around it. Cover one side of the black paper in glue, and wrap it around the cardboard tube.
- Draw and cut out a pair of bat wings. You can draw around the template, or sketch and cut out a pair of wings free hand.
- Glue the cardboard tube in the center of the bat wings, and add a pair of googly eyes.You can also draw eyes on a scrap of white paper in black pen, cut them out, and stick them on.
- Cut out a pair of fangs from a scrap of white paper and glue them on the bat.
- Cut two long triangles from scraps of black craft paper, and two slightly smaller ones from scraps of pink paper.
- To make your bat’s ears, stick pink triangles on top of the black ones, and glue these to the inside rim of the cardboard tube to make your bat’s ears.
- This step should be handled by adults: Make two holes on the bottom edge of the front of your cardboard tube. Use a hole punch if you have one, or use scissors, taking care not to poke yourself.
- Cut the chenille stem in half. Fold each half in half again, then thread through the holes and twist around each other to make the bat’s legs/feet. Trim the chenille stems if they seem too long.
- Display your finished vampire bat!
(Source: TheBearAndTheFox)
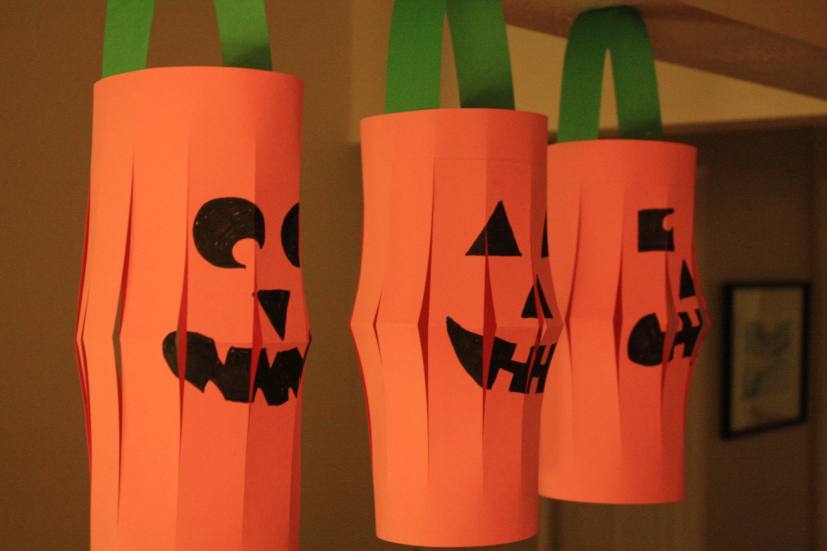
Paper Jack-O-Lanterns
Decorate the inside of your house with these adorable pumpkin lanterns that are simple but fun to make.
Materials needed:
Stapler
Orange and green construction paper (12 x 18″, but letter size will work, too)
- Black markers, paint, or construction paper
- Scissors
- Ruler
- Pencil
- Tape
- Glue
Directions:
- Draw or glue a jack-o-lantern face in the center of a sheet of construction paper. Your kids can use black markers, paint or cut-out shapes from black construction paper, if you have it.
- Fold the sheet of paper in half lengthwise. With a pencil and ruler, draw a line lengthwise on the paper one inch from the top of the unfolded edge. This is the “do not cut line” that marks where to stop cutting. From the folded edge to the do not cut line, take a pencil and ruler and draw lines one inch apart. Cut the paper along the lines to the “do not cut” line.
- Unfold the paper, and roll it into a cylinder. Tape the narrow edges together where they meet. The middle of the lantern will flare out at the crease.Cut a strip from the narrow end of a sheet of green construction paper for the jack-o-lantern’s handle/stem. Use the stapler or tape to affix the handle to the top of the lantern.
(Source: MarinMommies)
Yarn Mummies
A simple craft that’s great for parties or for something fun to do after school, these yarn mummies are an entertaining craft for kids of all ages. Pre-cut the template and glue the eyes for younger children, so all they need to do is wrap up the mummy!
Materials needed:
- Tape
- Paper template
- Black paper (Cardstock or poster board)
- Scissors
- School glue
- Hot glue/glue sticks
- Googly eyes
- White yarn

Directions:
- Print the mummy template and cut it out. Use the template to trace the shape onto black paper. Show your kids how to cut the mummy from either black cardstock, thick construction paper or poster board.
- Hot glue can help the googly eyes set quickly. If younger kids are doing this craft independently, have them use school glue to attach the googly eyes to the black cutout instead.
- Using a small piece of masking tape, attach the end of the yarn to the back of the template.Wrap the yarn in alternating directions to create mummy bandages.When finished, cut the yarn and secure it with another piece of masking tape or a dot of hot glue.
(Source: That’sWhatCheSaid)
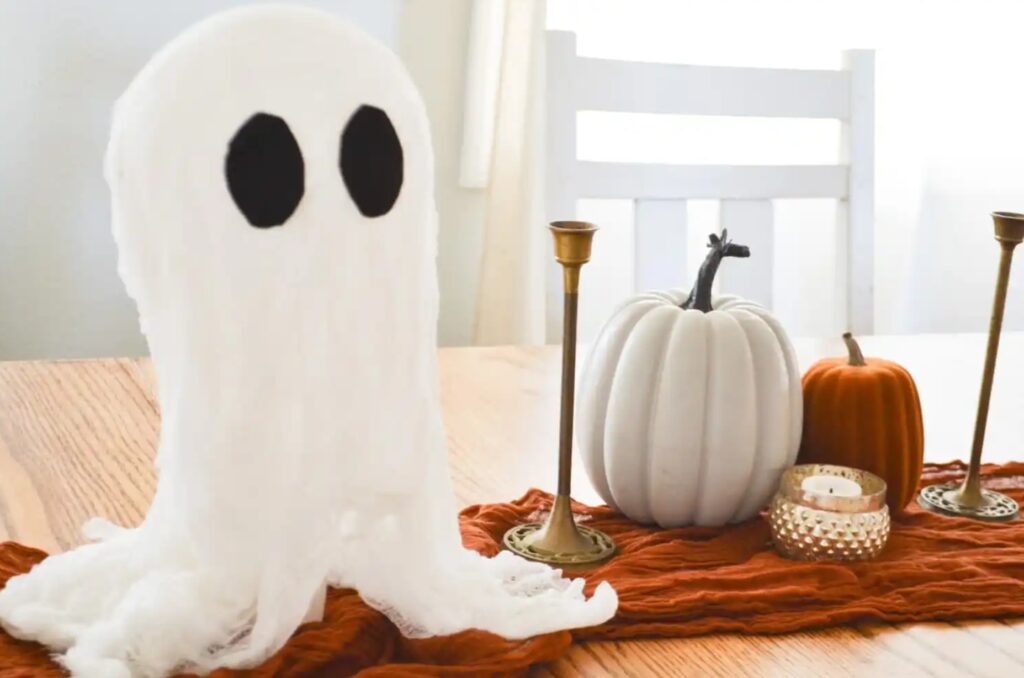
Cheesecloth Ghost
Made from a balloon and cheesecloth, this lifelike ghost appears to float when finished. Add a LED candle for an extra boo-tiful effect.
Materials needed:
- Battery-powered candle
- Metal baking tray or large piece of plastic
- Glass mason jar
- Balloon(s) – it’s good be prepared with extras, if needed
- Cheesecloth
- Foam brush
- Stiffy glue
- Black felt
Directions:
- Place the mason jar on the tray or piece of plastic.
- Blow up a balloon halfway, tie it and put it in the top of the glass jar.
- Tape the balloon to the jar, then place a layer of cheesecloth over the balloon and jar.
- Before folding another layer of cheesecloth, apply a layer of stiffy glue with a foam brush until it is painted over the layer.
- Repeat with each layer you fold over.
- Let the glue dry, then remove the ghost from the jar and pop the balloon. The ghost should stand on its own!
Have your kids cut out two oval eyes from the felt and glue them onto the ghost. If you don’t want to use felt for the eyes, large googly eyes are also an option. If you’d like, place a battery-operated candle under the ghost for a fun glow.
(Source: 1905 Farmhouse)
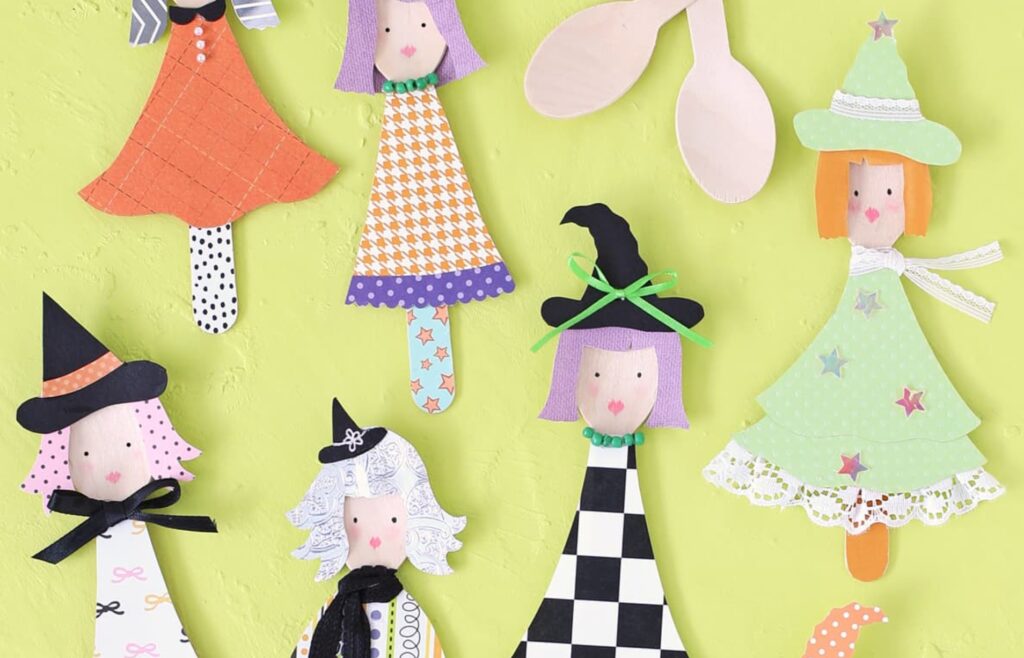
Wooden Spoon Witches
A whimsical way to honor the witchy energy of the season while encouraging your child’s creativity, these wooden spoon witches are a fun way to spend an afternoon with your kids.
Materials needed:
- Disposable wooden spoons
- Assorted scrapbook paper
- Hot glue gun and glue gun sticks
- School glue stick or glue pen
- Paint or gel pens
- Cotton swab
- Pink chalk, ribbon, beads, lace, sequins, washi tape or other decorations.
Directions:
- Use a pencil to draw a witch’s hat and hair onto the back side of paper scraps (so your pencil lines won’t show).
- Trace the spoon shape onto the paper to get the right sizing.
- Glue all pieces of paper to the spoon. A school glue stick is great for the legs and dress, but you might want to use hot glue for the hair.
- Attach the pieces in the right order—legs, dress, hair, then hat on top of hair. Work from back to front to determine the order.
- Now for the fun part: personalizing each witch! Add bows, beads, buttons, sequins, tape and other decorations to give each witch their own style. Display the finished witches around your home to create a festive holiday spirit.
(Source: TheCraftPatchBlog)