Christmas is almost here, which means you likely have more time to get crafty with your kids as the year winds down. Instead of baking cookies, try these four simple crafts to trim your tree and adorn your hearth.
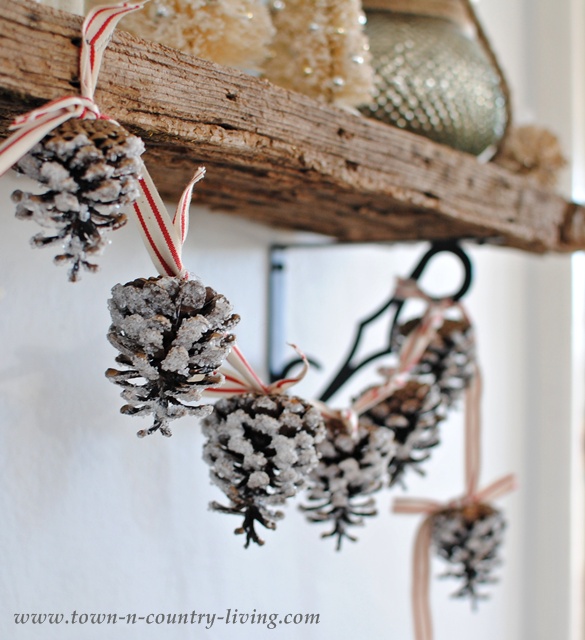
1. Pinecone Garland
Great as a tree trimming or piece of fireplace decor, this pinecone garland costs less than $4 to make.
Materials:
- A handful of pine cones from your yard (or nearest wooded area)
- Mod podge
- Foam brush
- Epsom salt
- Hot glue gun
- Striped ribbon
Directions:
1. Gather some pinecones from your yard or closest forest.
2. Use the foam brush to apply the mod podge to each pine cone. For a snow-laden effect, use lots of mod podge.

3. Sprinkle the pine cones with Epsom salt. Don’t shake until the cones are dry to ensure the salt sticks.
4. Use a hot glue gun to attach a short piece of ribbon to the base of each pine cone.
5. Tie each pine cone to a long piece of ribbon to make the garland, keeping your knots loose enough to move the pine cones once you hang it up.
(Source: Town and Country Living)
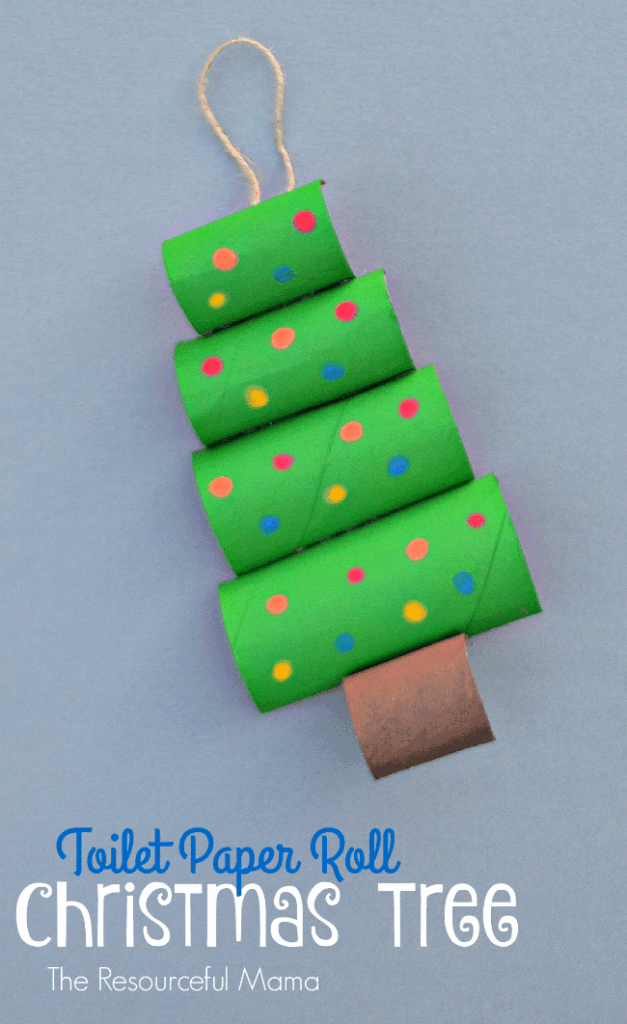
2. Toilet Roll Christmas Trees
An easy way to recycle finished toilet paper rolls and reduce waste, these cardboard Christmas trees make great ornaments.
Materials:
- 2 empty toilet paper rolls
- Green and brown paint
- Q-tips
- Assorted paint colors (for the lights)
- Glue gun
- Twine or string
Directions:
1. Cut each toilet paper roll in half lengthwise, so you have 4 equal sized pieces.
2. Leave one piece as is. Holding the pieces horizontal, cut a little off each of the other 3 pieces, cutting a little more as you progress through each one. When you lay them down, they should progressively get shorter towards the top of the tree.
3. Take the piece of cardboard you cut off last and use it for your tree stump.
4. Lay all the pieces out to form a tree. Use a hot glue gun to attach them to each other.
5. Paint the tree green and the stem brown and allow it to dry.
6. Once dry, take Q-tips and paint lights on the tree with various colors of paint.
(Source: TheResourcefulMama)
3. Popsicle Stick Sled
Paint these simple sleds red and green for seasonal cheer or dress them up with fancy decorations like jingle bells and pine tree clippings.

Materials:
- Popsicle craft sticks (2 regular and 5 small sized per sled)
- Wood glue
- Wood stain
- Paint
- Twine
- Glue dots
- Embellishments if desired (jingle bells, pine tree greenery, twine)
Directions:
1. Glue 4 small craft sticks together, staggering the end stick on each side slightly lower. To make this process easier, squirt some glue onto a paper plate, and use a large toothpick or skewer to apply the glue along the edges. Allow to dry.
2. Paint the small craft sticks whatever color you would like. Allow to dry.
3. Stain the regular sized craft sticks using a rag.
4. Glue on the stained sled runners to the smaller popsicle sticks. Use a skewer or large toothpick to apply the glue.
5. Glue on the cross sticks to the front of the sled.
6. Add embellishments, such as sprigs of faux greenery wrapped in baker’s twine; thread on a couple small jingle bells.
7. Cut some regular twine to your desired length, and attach to the underside of the cross bar using glue dots. Regular craft glue can also be used, but glue dots are way less messy.
8. Have your kids write their names on their decorated sled (and the year it was made).
9. Use the sled as an ornament, as a name card on your Christmas table, or decor for presents.
(Source: CleanAndScentsible)
4. Salt Dough Ornament
Colorful and sturdy, these glittery ornaments are an inexpensive way to make a piece of tree decor that will last you for holiday seasons to come.
Materials:
- 4 cups flour
- 1 cup salt
- 1.5 cups water, more as needed
- Christmas cookie cutters in various designs
- Clear glaze spray
- Glitter in red, silver and green
- Twine
Directions:
1. Preheat your oven to 200 degrees Fahrenheit.
2. Combine flour, salt and water and mix well. If the dough is too dry, add a little bit more water. If it’s too sticky, add a little bit of flour.
3. Place flour on your counter and coat your hands with it. Knead the dough until it becomes really smooth (about 10 minutes).
4. Once you’re done kneading, roll out the dough to about 1/2 cm thickness. The thinner you make the ornaments, the better they will thoroughly bake and dry through. If you make them too thick, they will take too long to dry.
5. Using your Christmas cookie cutters, cut out different shapes for your salt dough ornaments.
6. Using a straw, make a hole in the top of the ornament for where you would like the twine to hang.
7. Optional: For a faster baking process, let the dough air dry for a day.
8. Bake for 1-2 hours. If your ornaments are not completely dried through when you pull them out, put back in for another hour. Baking time will vary greatly depending on the size and thickness of your ornaments. Larger ornaments will take longer, where smaller ornaments will take less time. NOTE: If you notice puffing when baking, it is likely because the ornaments are too thick. In this case, let them air dry for a few days before baking.
9. Flip the ornaments when air drying or baking so that the bottoms dry as well.
10. Once cool and completely dried, paint with non-toxic acrylic paint.
11. Before adding the glitter, you’ll need to seal the ornaments with clear glaze. This will help them keep longer. Make sure your ornaments are completely dried through before sealing.
12. Now add clear glue on top of your ornament. Shake glitter on top until you fill the ornament with glitter. Kids will love helping with this part!
13. Add a piece of twine to each ornament before hanging, and store in a cool, dry place after the holidays.
(Source: TheBestIdeasForKids)