For Halloween, some kids look forward to dressing up as their favorite superheroes and TV show characters, while others look forward to eating far too much candy. As you carve pumpkins and decorate your house, add these fun crafts to your family time to make your child’s Halloween season extra spooky!
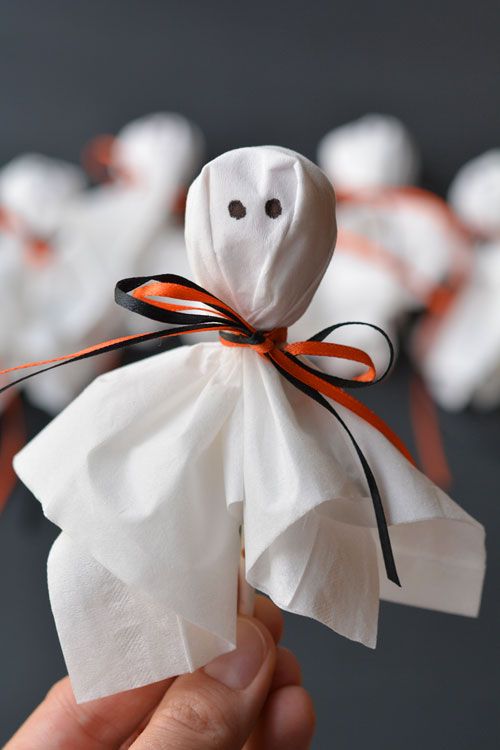
Lollypop Ghosts
This is a craft that gives back! You can make Lollypop Ghosts to give out to trick-or-treaters on Halloween night or make enough for your children to take to school to give to their class.
What You’ll Need:
- Kleenex Tissues
- Round Lollypops (Tootsie Pops)
- Black Sharpie
- Tiny elastics (you can get these from the hair section at the dollar store)
- Thin orange and black ribbon (optional)
Directions:
- You will need one full size tissue and one quarter piece of a tissue. (Cut a tissue into four squares.)
- Lay the quarter size tissue in the middle of the full-size tissue and then put the lollypop in the middle.
- Bunch up the tissue around the lollypop and then stretch the elastic over the lollypop to keep the tissue in place.
- Then, you can use a sharpie to make eyes on your candy ghost and decorate it in whatever way you would like!
- If you want, you can also tie black and orange ribbon around the lollypop for more decoration.
- It is as easy as that. Enjoy your spooky lollypops!
Source: One Little Project
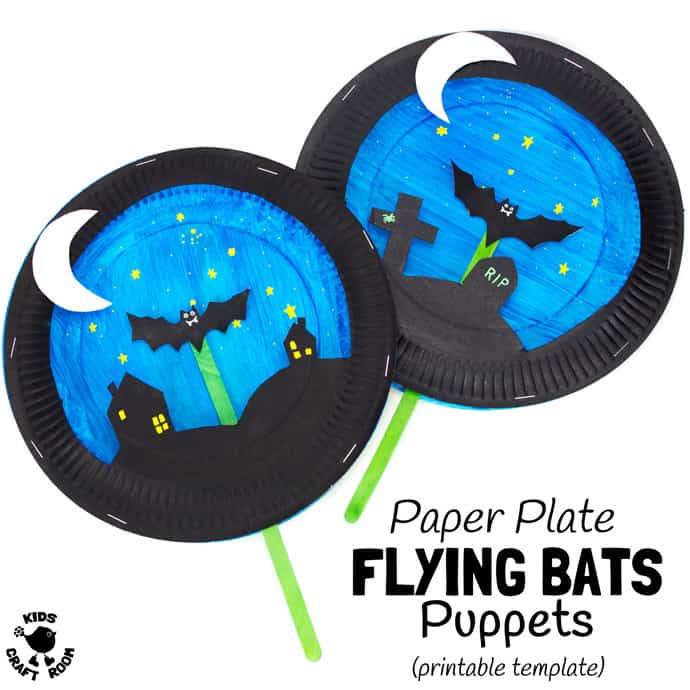
Paper Plate Flying Bats
This craft is fun and relatively easy. This craft is probably better for older children because it does require a bit more time and attention than some of the other crafts. The best part is that kids can play with this craft after making it!

What You’ll Need:
- 2 Paper Plates
- Printable Bat Craft Template (check the link below)
- 2 Craft Sticks
- Paint
- Glue
- Stapler
- Scissors
- Posca Paint Pens
Directions
- Print and cut out the bat craft template. (You can find two templates through the link provided.)
- Trace the outline of the template on the back of a paper plate in pen or pencil.
- Cut out the middle of the paper plate using the outline you made as a guide.
- Paint the cut paper plate and the bat black. (You can add eyes and teeth to your bat and windows on the house using Posca Paint pens. Get creative!)
- Paint the front of the second paper plate blue. (You can also use Posca Paints to add some yellow stars too).
- You need a handle to make your bat a puppet. To make the handle you will need to glue together two craft sticks. Glue the bat to the top of the craft stick handle too.
- Lay the black paper plate on top of the blue and place the bat handle so that it is sticking out between the two plates.
- Staple all around the paper plates, but leave a section at the bottom open so you can move the bat puppet from side to side.
- If you want to go the extra step, you can use the scraps from the paper plate you cut to make a moon that you can glue onto the rim of your flying bat craft.
- Now you can play with your craft! (For more clarity on how to make this craft visit the link below.)
Source: Kid’s Craft Room
Paper Cup Frankenstein
This fun Frankenstein craft even has a glow in the dark nose. You can use this craft to decorate your house for Halloween!
What You’ll Need:
- White paper cup
- Green and black craft paint
- Paintbrush
- Black marker
- Googly eyes
- Pencil flameless tealight
- Craft stick
- Black cardstock paper
- Craft knife
Directions:

- First, paint your paper cup green and a craft stick black.
- Once the paint is dry, you can draw Frankenstein’s hair with black marker.
- Then, glue the googly eyes under the hair.
- Use a pencil to poke a hole under the eyes, where Frankenstein’s nose would be. Then slide the flameless tealight through the hole from inside the cup.
- Now, you can draw Frankenstein’s mouth.
- Then, make two slits (be careful… parents should cut the two slits for safety purposes) on each side of the cup and slide the craft stick through the two slits.
- Finally, cut two small squares from the black cardstock paper and glue them on each end of the craft stick. Now you have a mini Frankenstein to decorate your home!
Source: Non Toy Gifts
Theron Pickett is currently a junior at Georgetown University, majoring in Government. She hopes to attend law school sometime after graduation.